Tutorial: Node.js and Express.js - Part I - Getting started
A couple of months ago a wrote a series of tutorials on scalatra. In this article, and a couple of follow ups, I’ll do the same for Node.js together with Express.js. I don’t think Node.js needs an introduction, since a lot has been written about this framework this last year. Express.js on the other hand, might not be so well known. Express.js is a lightweight node.js framework that allows you to create web applications and APIs much easier on top of node.js. In this series of articles we’ll look at a lot of the features Express.js provides.
In this first article though, we’ll keep things simple. I’ll show you the following things:
- Installing Node.js and Express.js
- Create our first 'hello world' application
- Expose the first operation of a REST API
Installing Node.js and Express.js
The first thing we need to do is install Node.js. There are packages for all platforms availabel from the node.js site at: http://nodejs.org/download/

Choose the package for your environment, and install node.js. This will install, together with some other stuff, the npm and node binaries. To test whether everything is installed correctly open up a terminal and type “node”. This will open the interactive node.js shell. In this shell type (or copy) the following (to exit hit CTRL+C twice):
jos@Joss-MacBook-Pro.local:~$ node
> console.log('hello world');
hello world
undefined
>
(^C again to quit)
>
This was your first node.js program. Hello world in one line. For a more complex example, you could copy the following (from the nodejs.org site):
jos@Joss-MacBook-Pro.local:~$ node
> var http = require('http');
undefined
> http.createServer(function (req, res) {
...   res.writeHead(200, {'Content-Type': 'text/plain'});
...   res.end('Hello World\n');
... }).listen(1337, '127.0.0.1');
{ _connections: 0,
  connections: [Getter/Setter],
  allowHalfOpen: true,
  _handle: null,
  _events:
   { request: [Function],
     connection: [Function: connectionListener] },
  httpAllowHalfOpen: false }
> console.log('Server running at http://127.0.0.1:1337/');
Server running at http://127.0.0.1:1337/
undefined
>
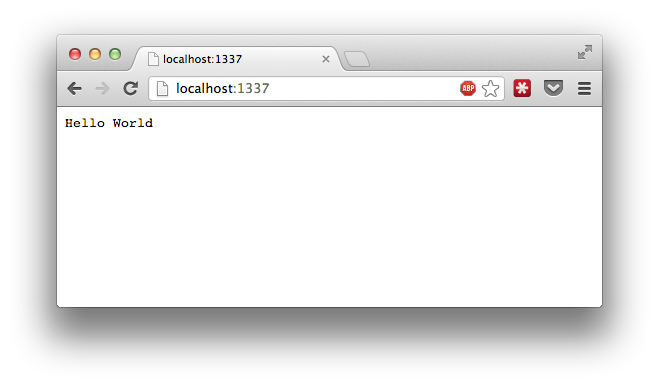
This starts a complete webserver, running at localhost port 1337. If you open this in your browser, you’ll see the following:

For now that’s enough to know that node.js is working correctly. Now we need to setup express. Luckily this isn’t that difficult,since npm, a package manager, allows us to easily install express in a specific directory. So before we get started, we first need to create a directory that’ll hold our project files.
mkdir express
We can now use npm to install the correct packages (express in our case). For this npm check for a package.json file in this specific directory. So enter this directory and create a package.json file with the following content:
{
  "name": "express-smartjava",
  "description": "Smartjava Express App",
  "version": "0.0.1",
  "private": true,
  "dependencies": {
    "express": "3.x"
  }
}
Now we can use npm to download the express dependencies by using “npm install”
jos@Joss-MacBook-Pro.local:~/Dev/WebstormProjects/express$ npm install
npm WARN package.json express-smartjava@0.0.1 No README.md file found!
npm http GET https://registry.npmjs.org/express
...
├── debug@0.7.0
├── mkdirp@0.3.3
├── send@0.1.0 (mime@1.2.6)
└── connect@2.7.0 (pause@0.0.1, bytes@0.1.0, formidable@1.0.11, qs@0.5.1)
Now you’ll have a node_modules directory that’ll contain express. (If you want to know exactly what’s installed run ‘npm ls’ in this directory). To test if all went correctly you can do the following:
jos@Joss-MacBook-Pro.local:~/Dev/WebstormProjects/express$ node
> var express = require('express');
undefined
> var app = express();
undefined
>
If no errors are thrown, the express module is downloaded correctly.
Create our first 'hello world' application
Now that we’ve got the basics installed, we can create our first application. We can create our complete application from scratch or let express generate a skeleton for us. For this tutorial we’ll let express generate the skeleton. To do this, we first need to install express globally. We do this using npm:
jos@Joss-MacBook-Pro.local:~/Dev/WebstormProjects/express$ sudo npm install -g express
Password:
npm http GET https://registry.npmjs.org/express
npm http 304 https://registry.npmjs.org/express
npm http GET https://registry.npmjs.org/connect/2.7.0
npm http GET https://registry.npmjs.org/commander/0.6.1
npm http GET https://registry.npmjs.org/range-parser/0.0.4
npm http GET https://registry.npmjs.org/mkdirp/0.3.3
npm http GET https://registry.npmjs.org/cookie/0.0.5
npm http GET https://registry.npmjs.org/crc/0.2.0
npm http GET https://registry.npmjs.org/fresh/0.1.0
npm http GET https://registry.npmjs.org/methods/0.0.1
npm http GET https://registry.npmjs.org/send/0.1.0
npm http GET https://registry.npmjs.org/cookie-signature/0.0.1
npm http GET https://registry.npmjs.org/debug
npm http 304 https://registry.npmjs.org/connect/2.7.0
npm http 304 https://registry.npmjs.org/commander/0.6.1
npm http 304 https://registry.npmjs.org/mkdirp/0.3.3
npm http 304 https://registry.npmjs.org/range-parser/0.0.4
npm http 304 https://registry.npmjs.org/cookie/0.0.5
npm http 304 https://registry.npmjs.org/crc/0.2.0
npm http 304 https://registry.npmjs.org/fresh/0.1.0
npm http 304 https://registry.npmjs.org/methods/0.0.1
npm WARN package.json methods@0.0.1 No README.md file found!
npm http 304 https://registry.npmjs.org/send/0.1.0
npm http 304 https://registry.npmjs.org/cookie-signature/0.0.1
npm http 304 https://registry.npmjs.org/debug
npm http GET https://registry.npmjs.org/mime/1.2.6
npm http GET https://registry.npmjs.org/qs/0.5.1
npm http GET https://registry.npmjs.org/formidable/1.0.11
npm http GET https://registry.npmjs.org/bytes/0.1.0
npm http GET https://registry.npmjs.org/pause/0.0.1
npm http 304 https://registry.npmjs.org/mime/1.2.6
npm http 304 https://registry.npmjs.org/bytes/0.1.0
npm http 304 https://registry.npmjs.org/formidable/1.0.11
npm http 304 https://registry.npmjs.org/pause/0.0.1
npm http 304 https://registry.npmjs.org/qs/0.5.1
/opt/local/bin/express -> /opt/local/lib/node_modules/express/bin/express
express@3.0.3 /opt/local/lib/node_modules/express
├── methods@0.0.1
├── fresh@0.1.0
├── range-parser@0.0.4
├── cookie-signature@0.0.1
├── cookie@0.0.5
├── crc@0.2.0
├── commander@0.6.1
├── debug@0.7.0
├── mkdirp@0.3.3
├── send@0.1.0 (mime@1.2.6)
└── connect@2.7.0 (pause@0.0.1, bytes@0.1.0, formidable@1.0.11, qs@0.5.1)
Now we’ve got an ‘express’ binary we can use to generate the skeleton. Go up one directory and run the following:
jos@Joss-MacBook-Pro.local:~/Dev/WebstormProjects$ express express
destination is not empty, continue? y

   create : express
   create : express/package.json
   create : express/app.js
   create : express/public
   create : express/public/images
   create : express/routes
   create : express/routes/index.js
   create : express/routes/user.js
   create : express/public/stylesheets
   create : express/public/stylesheets/style.css
   create : express/views
   create : express/views/layout.jade
   create : express/views/index.jade
   create : express/public/javascripts

   install dependencies:
     $ cd express && npm install

   run the app:
     $ node app
This will override the current files, and setup a basic skeleton we can start with. Go into the directory and install the dependencies (npm install) and then you can run the skeleton (node app).
jos@Joss-MacBook-Pro.local:~/Dev/WebstormProjects$ cd express
jos@Joss-MacBook-Pro.local:~/Dev/WebstormProjects/express$ npm install
npm WARN package.json application-name@0.0.1 No README.md file found!
npm http GET https://registry.npmjs.org/jade
npm http 304 https://registry.npmjs.org/jade
npm http GET https://registry.npmjs.org/commander/0.6.1
npm http GET https://registry.npmjs.org/mkdirp
npm http GET https://registry.npmjs.org/coffee-script
npm http 304 https://registry.npmjs.org/commander/0.6.1
npm http 304 https://registry.npmjs.org/coffee-script
npm http 304 https://registry.npmjs.org/mkdirp
jade@0.27.7 node_modules/jade
├── commander@0.6.1
├── mkdirp@0.3.4
└── coffee-script@1.4.0
jos@Joss-MacBook-Pro.local:~/Dev/WebstormProjects/express$ node app
Express server listening on port 3000
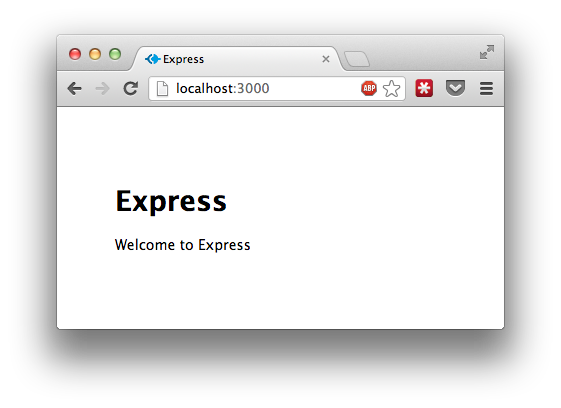
Now we’ve got a basic express web app running on port 3000.

So now that we’ve got the basic skeleton running (by using node app), lets change some of the templates to create our helloworld application. Open the app.js file in your editor of choice (if you don’t have a good editor you should use sublime 2). For now you can ignore most of the stuff in this file. The interesting part, and the one we’ll change for our helloworld example, is the following:
var express = require('express')
  , routes = require('./routes')
  , user = require('./routes/user')
  , http = require('http')
  , path = require('path');

...

app.get('/', routes.index);
app.get('/users', user.list);
What this means is, that when a user makes a GET request to the root “/”, routes.index is returned, and if a user makes a request to “/users”, the users.list is returned. Both of these are javascript functions. The routes variable is defined through the “require(./routes)” directive. Since this one points to a directory the “index.js” file is loaded. And the user variable points to the “./routes/user” file, which loads the user.js file from the routes directory.
For this example lets just change the output of the default page. For this we’ll have a look at the routes.index function in the index.js file:
exports.index = function(req, res){
  res.render('index', { title: 'Express' });
};
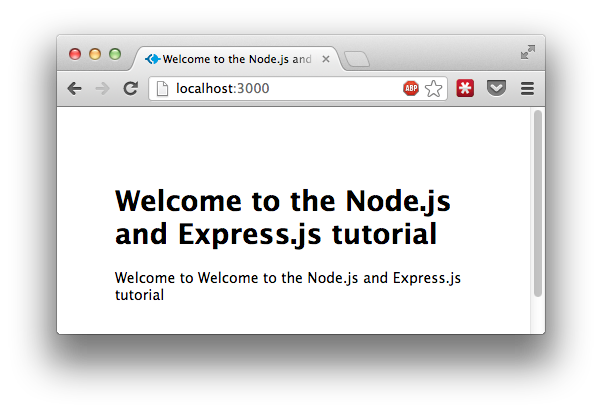
We’ll just change the title variable to “Welcome to the Node.js and Express.js tutorial”.
exports.index = function(req, res){
  res.render('index', { title: 'Welcome to the Node.js and Express.js tutorial' });
};
Now just restart node.js (exit using ctrl-c):
$ node app
Express server listening on port 3000
And when you now open localhost:3000 you can see the changed text.

Expose the first operation of a REST API
The final step we’ll take in this first part is we’ll make the start for a REST API. We’ll expand on this API in further sections to add persistency, security and more. For now we’ll just add support for one of the functions for this API. An API that allows us to bid on items. A sort of mini eBay. For now we’ll just support the function that allows us to return an auction item based on an id.
For this we want to be able to do the following:
Request:
GET /items/123
Response:
200 OK
Content-Length: 434
Content-Type: application/vnd.smartbid.item+json;charset=UTF-8

{
 "name":"Monty Python and the search for the holy grail",
 "id":123,
 "startPrice":0.69,
 "currency":"GBP",
 "description":"Must have item",
 "links":[
   {
    "linkType":"application/vnd.smartbid.item",
    "rel":"Add item to watchlist",
    "href":"/users/123/watchlist"
   },
   {
    "linkType":"application/vnd.smartbid.bid",
    "rel":"Place bid on item",
    "href":"/items/123/bid"
   },
   {
    "linkType":"application/vnd.smartbid.user",
    "rel":"Get owner's details",
    "href":"/users/123"
   }
 ]
}
So how do we do this in Express.js? We have to start with creating a router that handles these requests. To keep it clean we create a new file called smartbid.js, that’ll hold all the logic for our mini-ebay site. So create a smartbid.js file in the routes directory and add the following to that file:
// just a dummy response for now, persistence we'll add later
var dummyResponse =  {
    "name":"Monty Python and the search for the holy grail",
    "id":123,
    "startPrice":0.69,
    "currency":"GBP",
    "description":"Must have item",
    "links":[
        {
            "linkType":"application/vnd.smartbid.item",
            "rel":"Add item to watchlist",
            "href":"/users/123/watchlist"
        },
        {
            "linkType":"application/vnd.smartbid.bid",
            "rel":"Place bid on item",
            "href":"/items/123/bid"
        },
        {
            "linkType":"application/vnd.smartbid.user",
            "rel":"Get owner's details",
            "href":"/users/123"
        }
    ]
};

// pass in the app so we can register routes
module.exports = function(app) {

    // called from app.js
    this.get = function(req, res){
        res.type('application/vnd.smartbid.item+json');
        res.send(200,dummyResponse);
    };

    // register the router
    app.get('/items/:itemid', this.get);
}
In this file we’ve defined a new route matcher (“app.get(‘/items/:itemid’, get);”), which will call the get method we defined in this same file. In this function we set the content-type of the response and return a dummy response with code 200. This won’t work yet, we now need to configure express.js to include this route file in its configuration. For this we need to change the smartbid.js to the following:
// just a dummy response for now, persistence we'll add later
var dummyResponse =  {
    "name":"Monty Python and the search for the holy grail",
    "id":123,
    "startPrice":0.69,
    "currency":"GBP",
    "description":"Must have item",
    "links":[
        {
            "linkType":"application/vnd.smartbid.item",
            "rel":"Add item to watchlist",
            "href":"/users/123/watchlist"
        },
        {
            "linkType":"application/vnd.smartbid.bid",
            "rel":"Place bid on item",
            "href":"/items/123/bid"
        },
        {
            "linkType":"application/vnd.smartbid.user",
            "rel":"Get owner's details",
            "href":"/users/123"
        }
    ]
};

module.exports = function(app) {
    app.get('/items/:itemid', get);
}

// called from app.js
get = function(req, res){
    res.type('application/vnd.smartbid.item+json');
    res.send(200,dummyResponse);
};
Here we removed the routes, and split up the dependencies. We also added a new dependency to the file we just created and pass in the ‘app’ variable, so we can use it in our own route.
var express = require('express')
  , http = require('http')
  , path = require('path');

var app = express();

// pass in express app
var smartbid = require('./routes/smartbid')(app);

app.configure(function(){
  app.set('port', process.env.PORT || 3000);
  app.set('views', __dirname + '/views');
  app.set('view engine', 'jade');
  app.use(express.favicon());
  app.use(express.logger('dev'));
  app.use(express.bodyParser());
  app.use(express.methodOverride());
  app.use(app.router);
  app.use(express.static(path.join(__dirname, 'public')));
});

app.configure('development', function(){
  app.use(express.errorHandler());
});

http.createServer(app).listen(app.get('port'), function(){
  console.log("Express server listening on port " + app.get('port'));
});
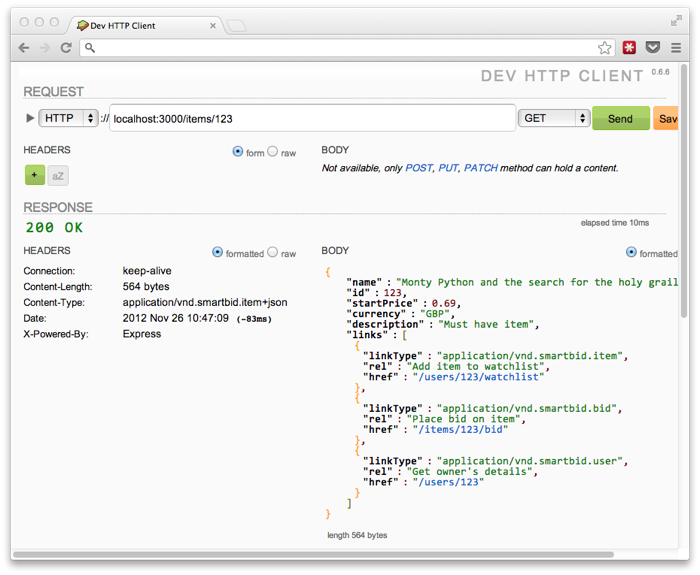
And that’s it. Restart the node.js application, and you can test whether this call is working. I always test with the chrome App “Dev HTTP Client”, that you can get from here. The request and response for this simple app now look like this:

That’s it for this part of the tutorial. In the next week or so, the next part in this series will be up, where we’ll expand on this REST API and slowly add testing, media-type negotiation, persistence and security.